
Summary
- What is Git?
- How To Start A Git Project
- How To Send The First File To Git
- Branches
- Pull Requests
- How To Get Changes From Others In The Repository
- How To Delete A Repository
- Conclusion
1. What Is Git?
Git is a popular version control system used by developers to manage and track changes to their codebase.
Whether you’re a beginner just getting started with Git or an experienced user looking to refresh your knowledge, understanding the main Git commands is essential.
In this post, we’ll explore some of the most commonly used Git commands and how they can help you manage your codebase more effectively. From creating a repository and committing changes to branching and merging, we’ll cover everything you need to know to get started with Git.
So, let’s dive in and explore the world of Git!
2. How To Start A Git Project
2.1 – How To Create A GitHub Account
First of all, you’ll need to create an account in a repository platform, like GitHub, GitLab, BitBucket, etc.
I recommend you using the GitHub because it is the most popular solution.
After creating your account, you’ll need to create a repository
Creating A Token To Your Computer
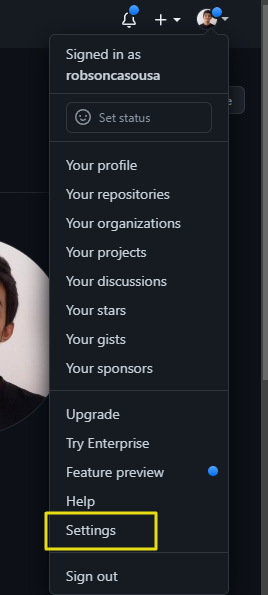
1 – Go to Settings
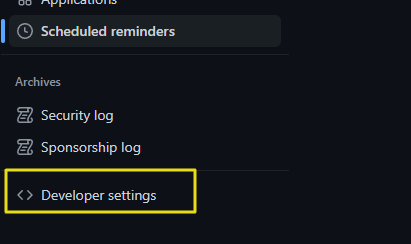
2 – Go To Developer Settings
3 – Click on Personal Acess Tokens, Tokens (classic), and Generate new token
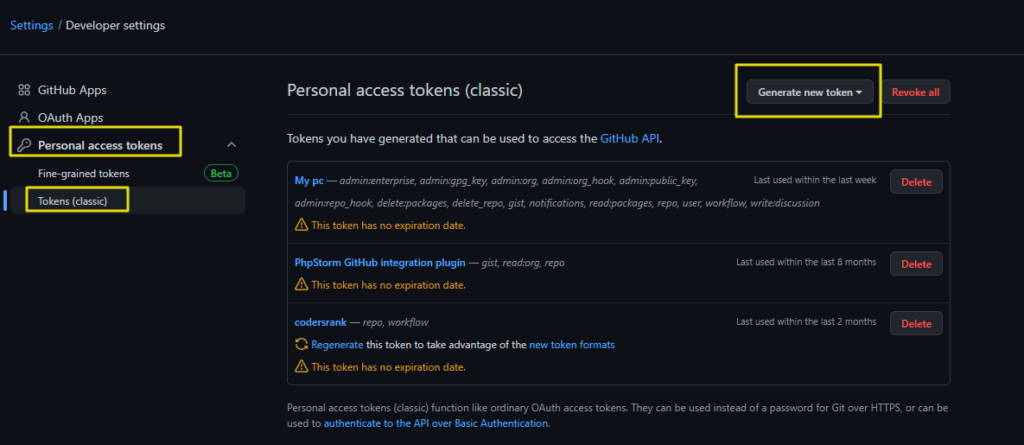
4 – Give a name, set No expiration and give all the permissions (or as you want)

2.2. How To Create A Repository
What Is A Git Repository?
A repository (or “repo” for short) is a central location where a project’s files and history are stored.
It is essentially a directory on your computer that has been initialized with Git, allowing you to track changes to your files over time and collaborate with others.
Follow the steps to create a new repository:
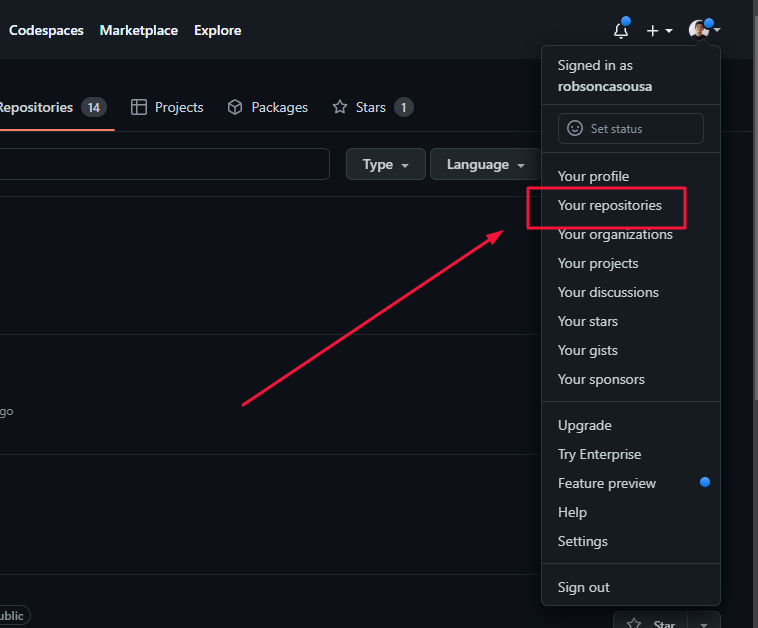
1 – Go to your repositories page by clicking in the menu => Your repositories (see the image)
2 – Click on New button

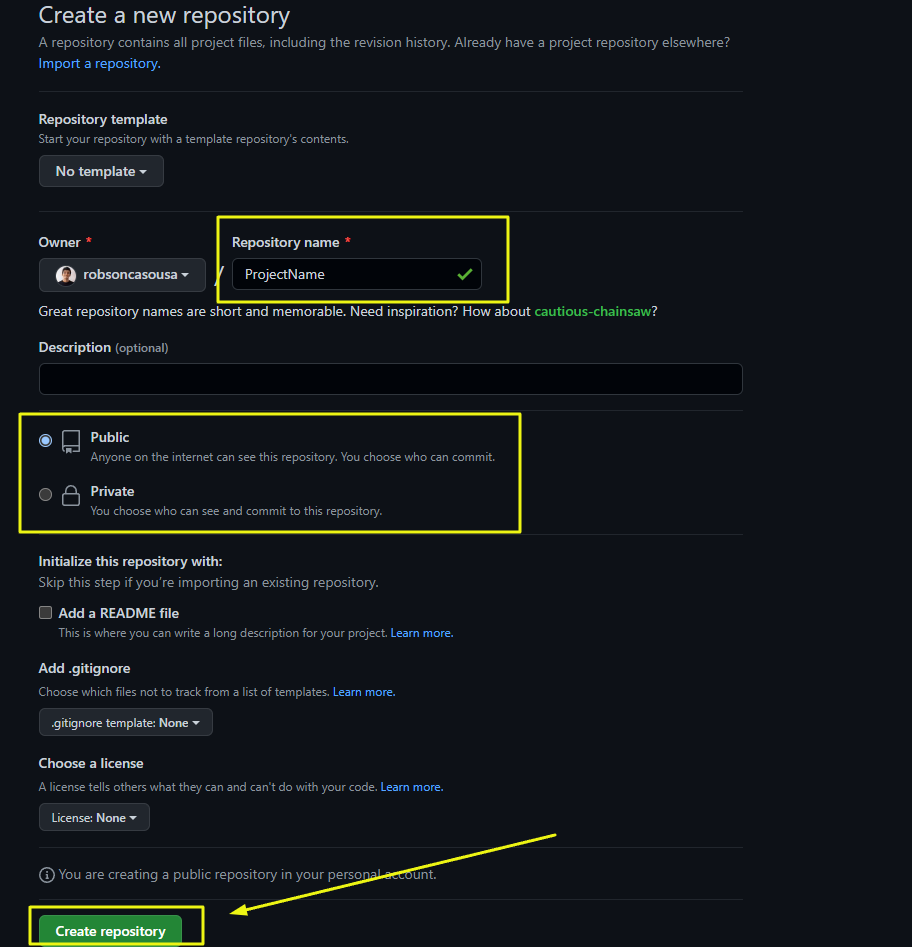
4 – It’s Done! In the new repository page, you’ll have some options to start the directory in your machine, let’s go through it.
2.3. How To Create The Project In Your Machine
Now you are going to create the project directory in your machine and associate it to the created repository:
- Install Git on your computer. You can download the latest version of Git in the Git Oficial Website.
- Create a new directory for your project on your computer.
- Open the command prompt or terminal and navigate to the directory you just created.
- Initialize a new Git repository by running the following command:
git init.
– This will create a.gitdirectory to your project folder. In this folder will be stored the changes that we make to your project.
– And will create a.gitignorefile where you can define some files to not being sent to the repository.
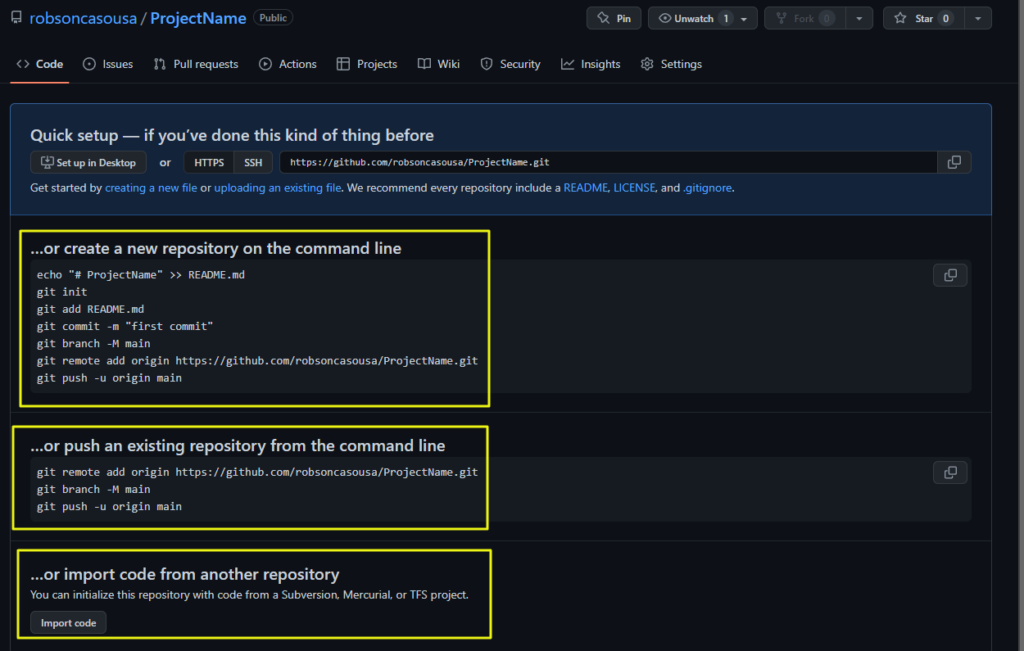
3. How To Send The First File To Git
Now that you have started the Git in your project, you will create file into the project directory and you’re going to send it to the
- Create a file called
README.md. In this file you can put some information about the project. - Open the command prompt or terminal and navigate to the directory you just created.
- Add the file to the list of files to be sent by running
git add README.md - Now you’ll save the added list to you git locally by running
git commit -m "Put Here The Message That Describes The Files You Are Sending" - You need to connect this directory to your remote repository by running
git remote add origin https://github.com/YourUserName/ProjectName.git - Then, you’ll send the git saved files to you remote repository by running:
git push -u origin main(I like master better than main :D) - You’ll be asked to prompt you username and password (token created above).

4. Branches
4.1. What Is A Branch?
When we are working in a code versioning control system like Git, we have different branches to work on. By default, the repository get started with the a branch, usually called main or master.
This branch will be the main branch of the project and most of the times you’ll need to work on other branch before sending the changes to the main branch.
This is because the main branch usually is set up in a automatic deploy to staging/production environment. In this case the main branch needs to be protected from direct push.
4.2. How To Create A New Branch
- First, you need to go to the branch you want to start from by running
git checkout main - Now you’ll create a branch that will be a replica of it
git checkout -b newBranchName - Then enter into the branch you just created
git checkout newBranchName
You can work on this branch and send your changes to it.
4.3. How To Push Changes To A New Branch
You can change your README.md file, but inserting some text and send the changes to this branch.
- First, create and enter into the new branch:
git checkout -b newBranchName
If you have already created the branch, so you don’t need the-b, just rungit checkout newBranchName - Change the file README.md
- Add the file
git add README.md - Commit the changes
git commit -m "changes to the README.md file" - Push the changes
git push origin newBranchName
5. Pull Requests
5.1. What Is A Pull Request?
A pull request is a way to propose changes to a repository. It’s a good practice only aske to merge your changes they are finished. So to avoid commit unfinished code to the main branch and break the application, you can work on a separate branch and when the changes are finished you’ll propose them to be merged to the main branch.
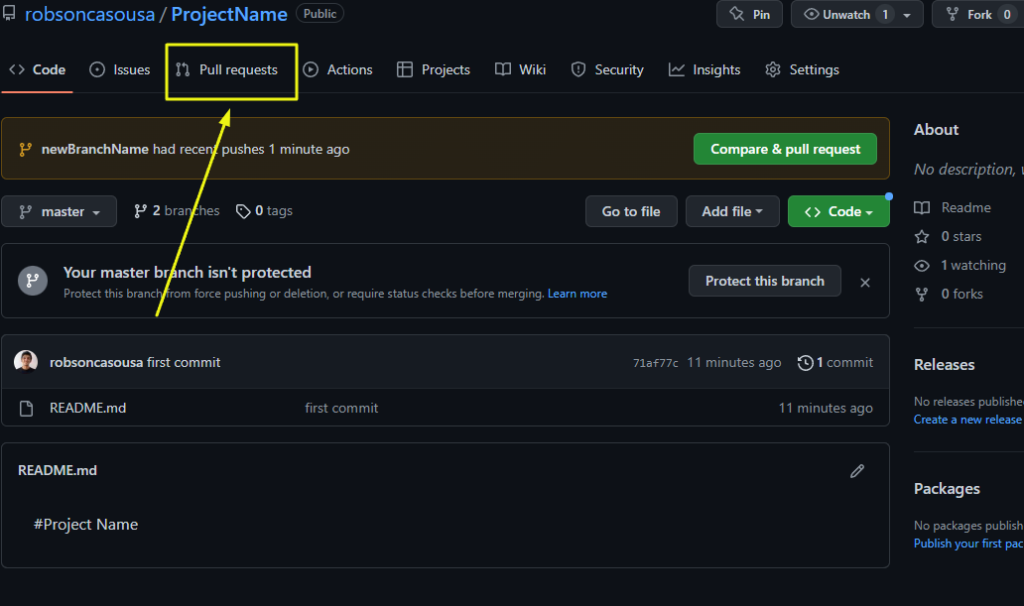
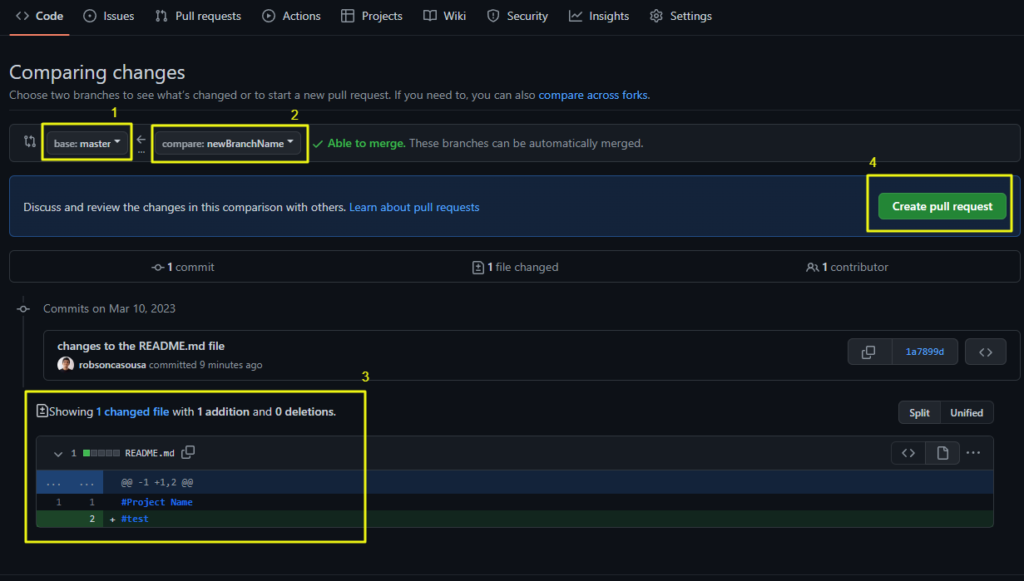
5.2. How To Create A Pull Request?
Now that you have pushed the changes to the newBranchName`, you’ll ask to this branch me merged to the main branch.
1 – Click On Pull Requests
(I know that github is trying to help us by showing an option to create a Pull Request right there, but I’ll show the full path to creating it)
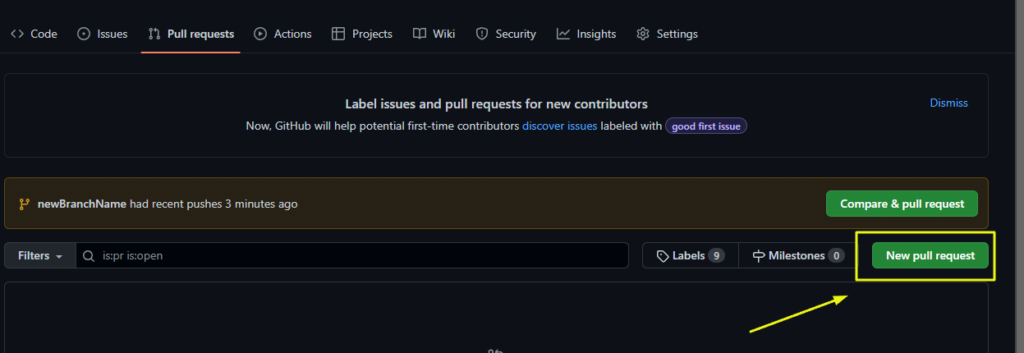
2 – Click on New Pull Request
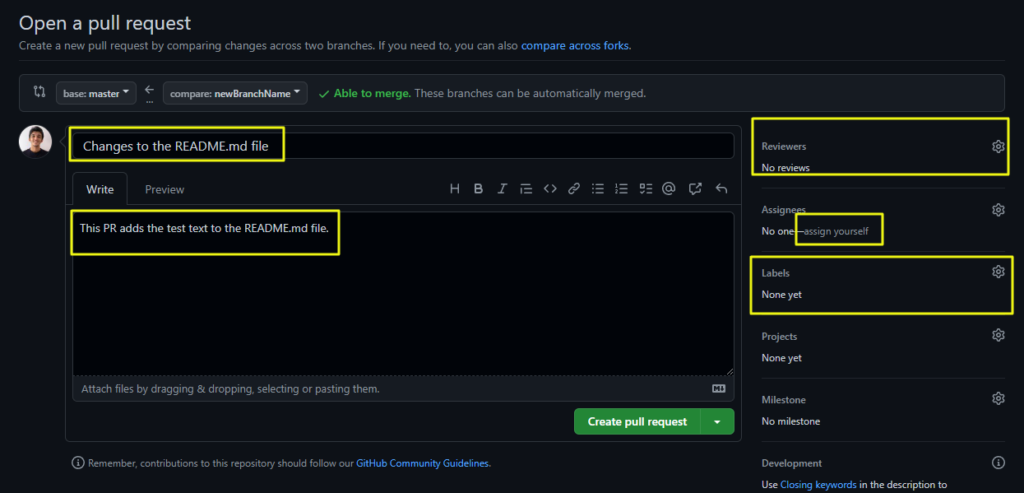
4 – The set up of a Pull Requests depends on your company/team, but it is usually like this:
- Fill out the title and description very described
- Select the reviewer to approve your Pull Request
- Assign the Pull Request to yourself, since it is your work
- Select the appropriate labels
- Click on Create A Pull Request
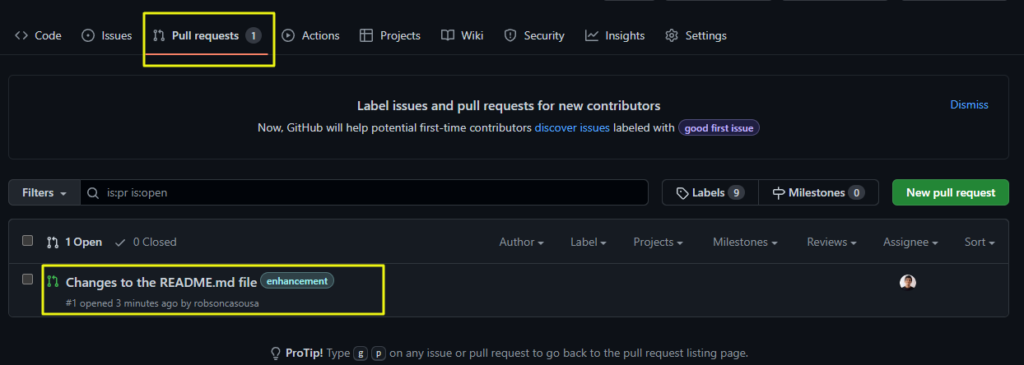
5.3. How To Do A Code Reviewing?
If you are the reviewer or if anyone can review the Pull Requests in your team, so it’s good to know how to review it.
Analyze the code
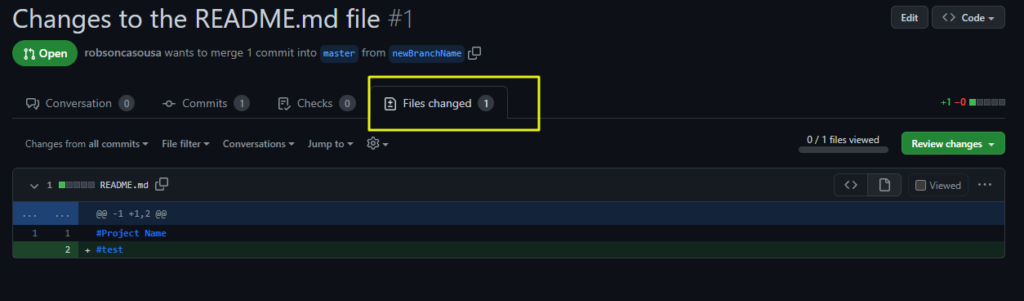
1 – Click on the Pull Request menu option, and then on the specific pull request you want to review.
Usually we analyze the Pull Requests from two perspectives: by reading the commits and the files changes.
2. Analyze the commit order and messages and their changes separately to understand the line of reasoning behind the changes.
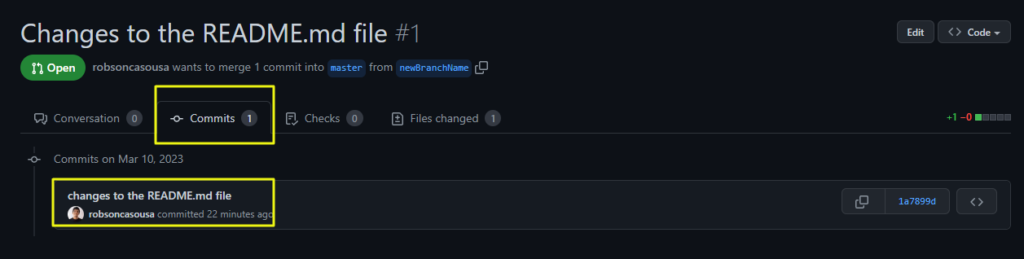
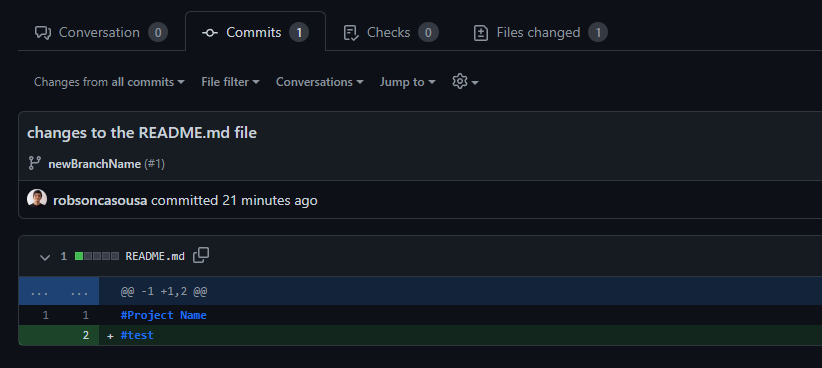
3. Analyze all the files changes if you want only see the final changes no matter the sequence of changes.
Ask Changes
You can ask the developer to change something. It’s important here adopt a soft language to avoid conflicts, like suggestions, questions, tips. See the example below.
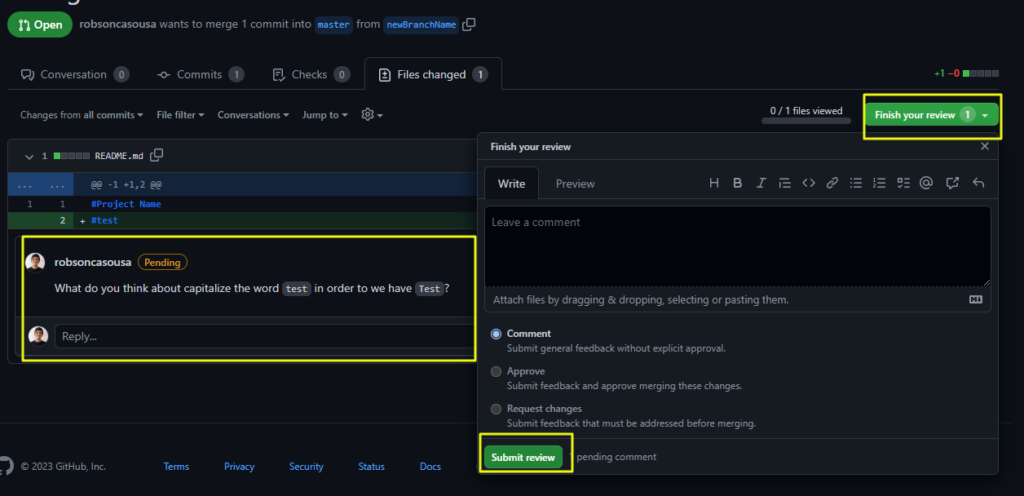
- Click on Review changes
- Fill out the reviewing text
- According the importance level of the asked changes, you’ll choose between just a
CommentorRequest Changes.
If you chooseRequest Changesthis will block the Pull Request from being merged by someone else, unless you approve the changes (or the admin remove your request)

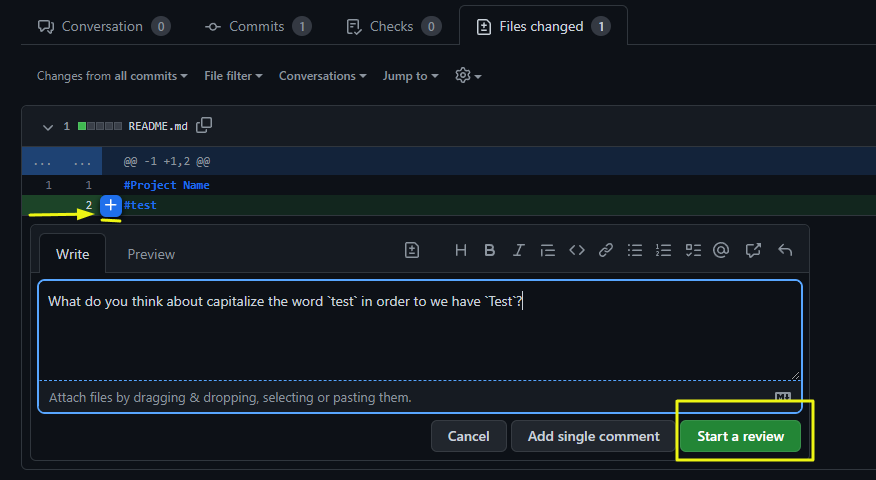
If you have considerations about specific lines of code, it’s a good reviewing practice left the comment right on the line you are talking about.
- Hover the line
- Click on the
+button - Put the text and click on
Start a review
Now you can finish your reviewing
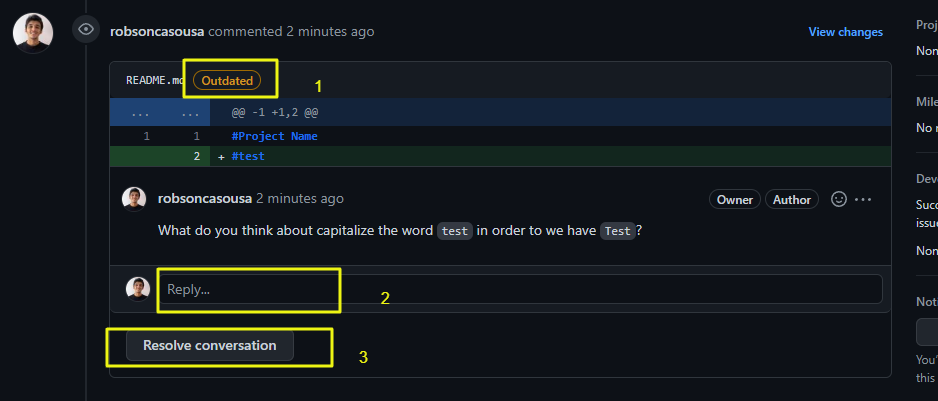
Resolve Requested Changes In A Pull Request
After you send the requested changes, you can resolve the request by doing this:
- Check the comment is outdated
- Reply to the review comment
- Click on Resolve conversation
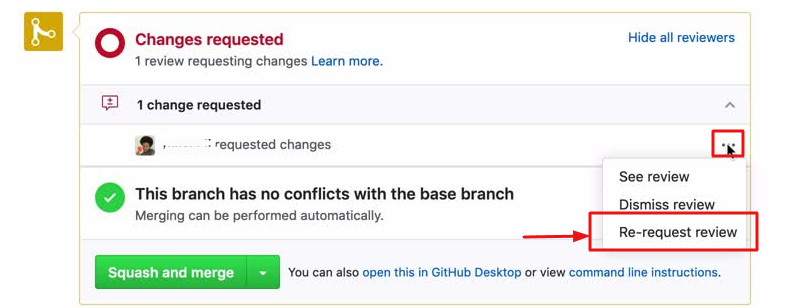
- Request a new review (github has this option but I can’t do this in my own PR)
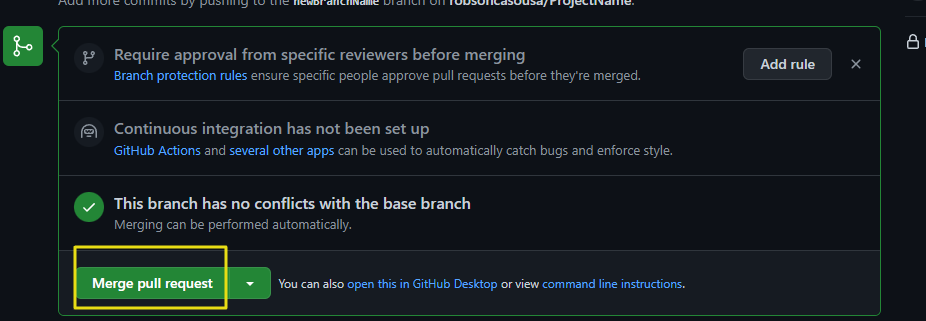
Approve And Merge Branch Changes
6 . How To Get Changes From Others In The Repository
When working in a collaborative team, we’ll often need to get changes from the remote repository to our machine, in order to keep our project up-to-date. So you just need to run:
git checkout main //to go the branch you want to get the changes
git pull origin main //to get the changes from the remote to your local project
7. How To Delete A Repository
1 – Go to your repository you want to delete and click on Settings
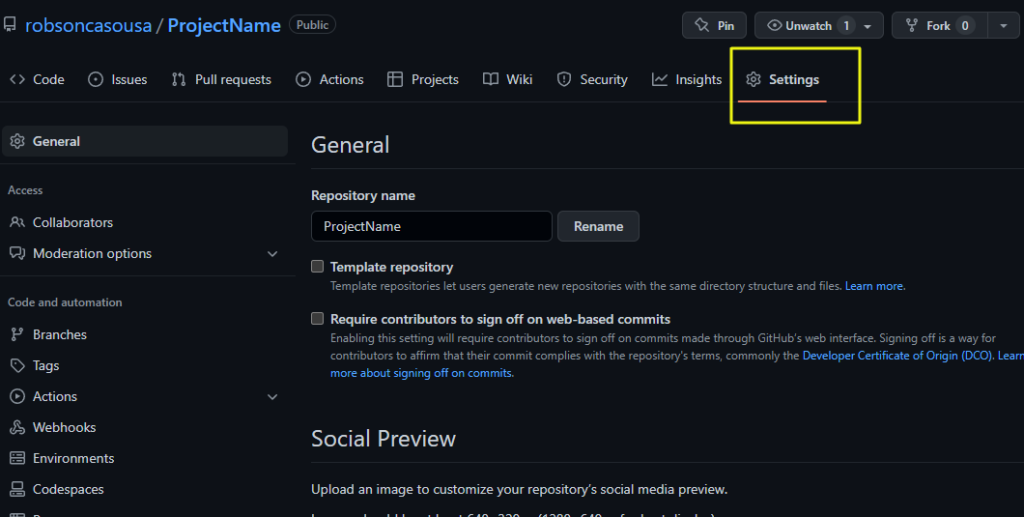
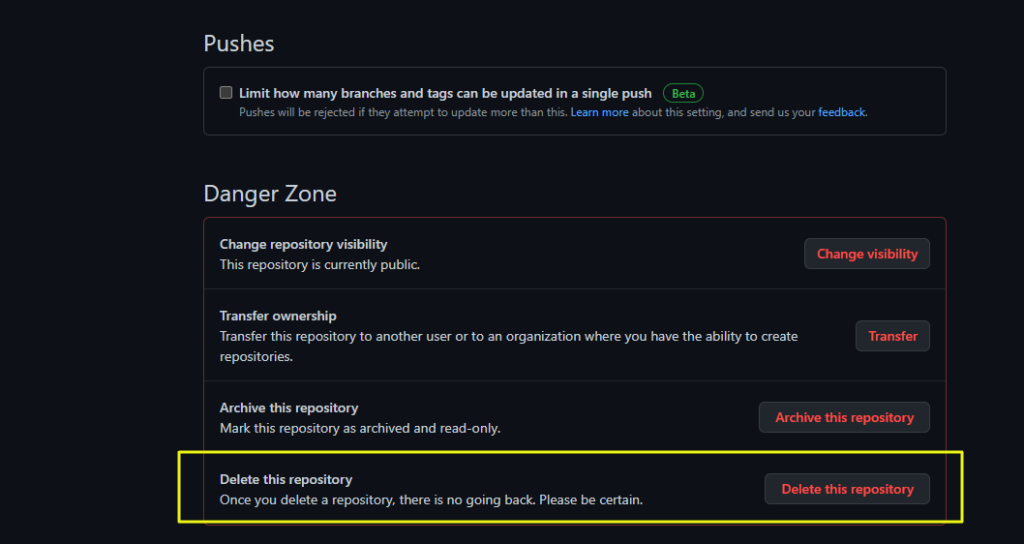
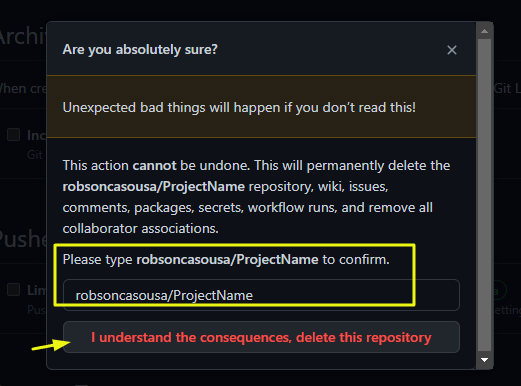
4 – Perhaps you’ll be asked to prompt your password. Do it!

8. Conclusion
With the use of features such as pull requests, Git enables collaboration, code review, and discussion, leading to better code and a more efficient development process. As such, whether you’re working on an open-source project or developing software for your own company, understanding Git and its commands can greatly improve your workflow and productivity.
I recommend you read this other article of Codeium: the Best Free Github Copilot Alternative
Share this content: